Caulking is a simple skill that can prevent homeowner headaches in the long run. From your kitchen sink to your bathtub, and even the base of your toilet, caulk prevents water from reaching unwanted places. Here’s your step-by-step guide on how to replace the caulk on your sink, tub, or toilet.
Why Caulk Matters
Caulk dries out and degrades over time. As it breaks down, tiny amounts of water can seep behind surfaces no longer protected. Seems innocuous enough, but over time, it can cause mildew, mold, and even absorb bathroom odor. So if you can’t tell where that mystery smell is coming from, check your caulk.
Re-caulking an area is easy enough. Tackle it on a Saturday afternoon and you’ll still have time to cook out for dinner.
Tools you Need
- Caulk. Make sure to buy a color that matches the surrounding area, and that’s also rated for the appropriate use: interior/exterior and waterproof.
- Caulking gun. While you CAN simply squeeze some caulk tubes, a caulking gun is MUCH easier. And you’ll have it for future projects!
- Painter’s tape
- Razor, box cutter, or other scraper
- Mold and mildew cleaner
- Paper towels (it can be a messy process)
Step 1: Out with the Old
This should also answer the question “Can I simply caulk over the old stuff?” No. The answer is no.
Take a razor, box cutter, or other scraping tool and get rid of the old caulk. You might not get 100% of it, but the more you remove, the better your new bead will hold.
Step 2: Clean the Gap (and let it dry)
Since old caulk cracks, it’s likely you’ve uncovered some mold spots or other gunk. Grab your favorite bathroom cleaner and wipe down the area where the mold or grime is. This will get rid of any mold spots as well as dry debris from the scraping in step 1.
Let the area dry completely. Your new caulk will have trouble bonding to moisture, and if you don’t let it dry, you’ll trap that moisture. Kind of defeats the purpose of re-caulking, doesn’t it?
While you’re waiting for the surface to dry, it’s time to…
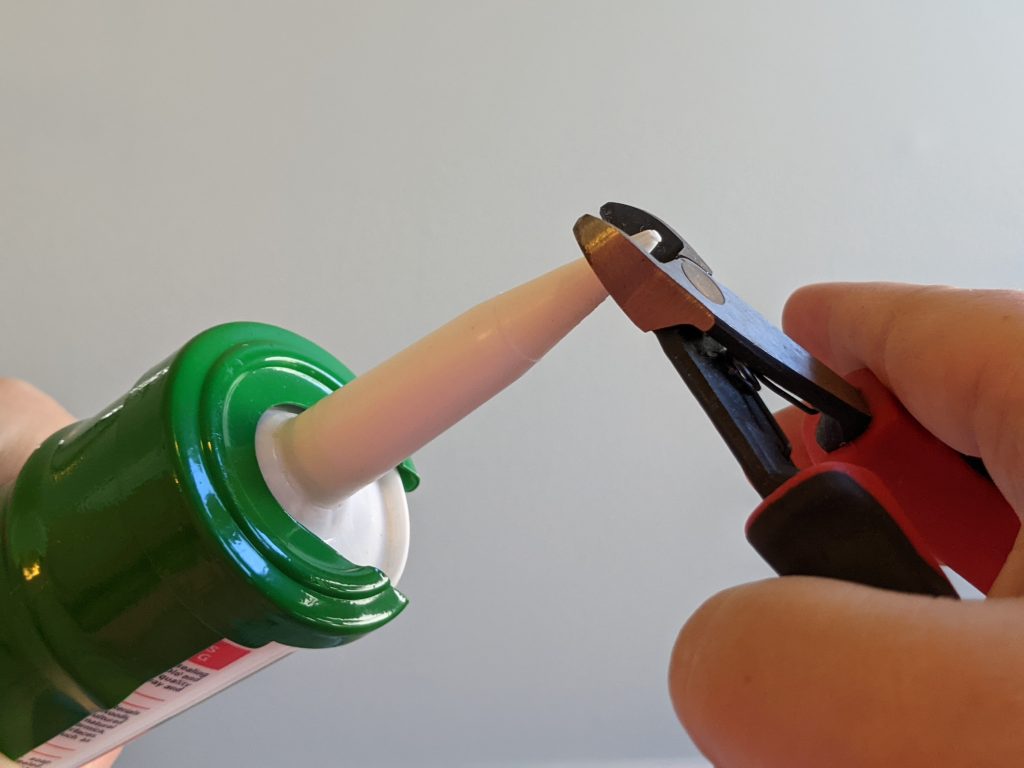
Photo Credit: Stuart Shefter
Step 3: Prep Your Caulk
Load your caulk tube in the gun. Pull the plunger all the way back, giving your tube plenty of room to slot in. Pull the trigger a couple of times to make sure there’s a snug fit.
Use your boxcutter or a hefty pair of scissors to cut the tip of the caulk tube. Don’t cut on an angle, that doesn’t make it easier, and in some cases, can make applying more difficult. Cut straight across the tip, at the angled part towards the end.
Many caulk tubes also have an internal foil seal. Pierce this with any long, sharp tool. Long screws or nails can work, and I’ve even seen someone use a grilling skewer (it was wooden, and that was its last use).
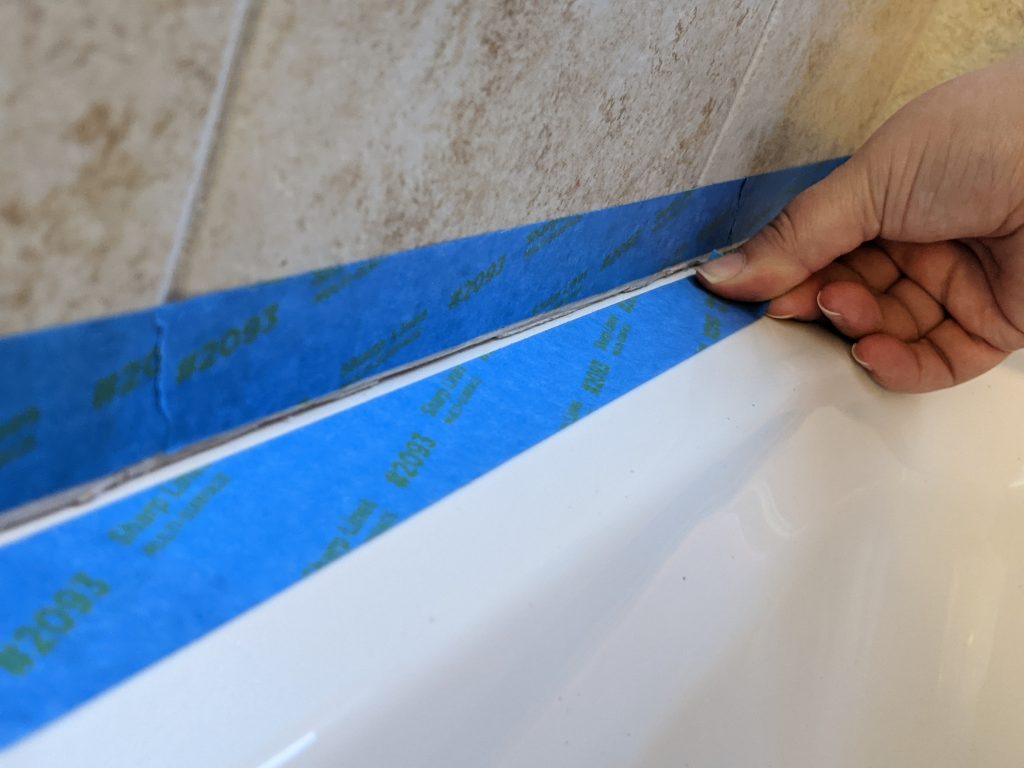
Photo Credit: Stuart Shefter
Step 4: Tape the Area
Taping around the caulk line is the easiest way to get a professional-looking bead on your first try. Leave about 3/8″ between your tape, where you’ll run the caulk. That’s the ideal gap for a functional and great-looking line. Keep in mind, this is after your surface has dried.
If you want to imitate the pros, overlap sections of tape by 2-3 inches. That way you can pull it up at once.
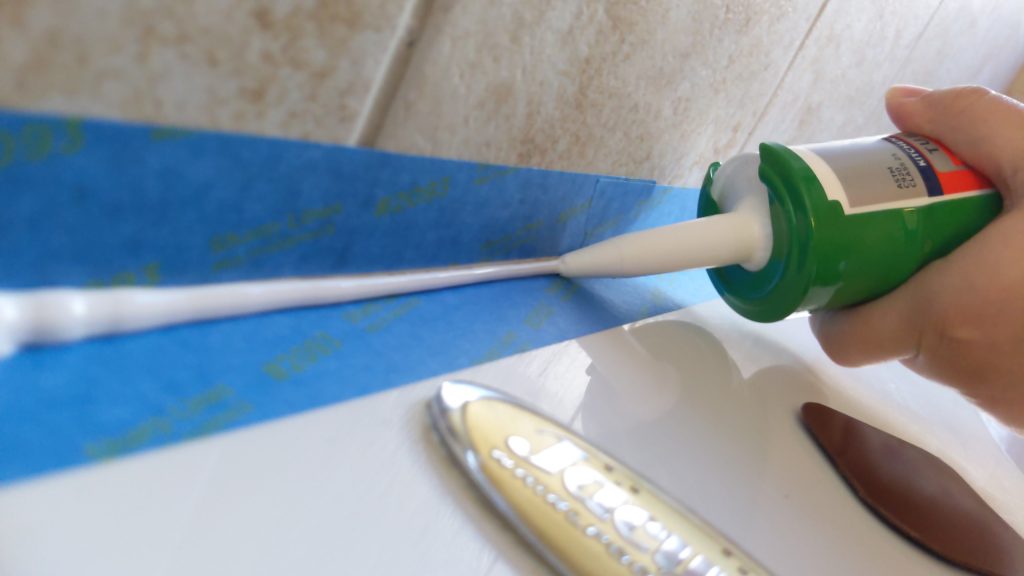
Photo credit: Stuart Shefter
Step 5: Apply Caulk
Time to get to business. If you want to practice, you can do so on a paper plate or other smooth, disposable surface.
Place your caulking gun at any starting point you choose. I prefer a corner if there’s no “end point.” Squeeze the caulk steadily as you move down the line. Keep the gun at the same angle throughout the bead. This usually means you’re shifting your whole body as you move down the line. Try not to use your wrists, which changes the angle of the gun. If you’re doing a longer run, divide it into a few sections. Don’t worry if it isn’t perfect, we’ll smooth everything out in the next step.
Want to be a crazy professional? Get the caulking tips. (Paid Affiliate Link)
Step 6: Smoothing it Over
Wet your index finger or grab a damp paper towel. Remember how caulk doesn’t like to adhere to wet surfaces? Now we can use that to our advantage.
Draw your wet index finger or damp paper towel across the caulk line, from the same starting point to finish. This will push it further into the gap and also smooth out any clumps. As with caulking, feel free to do this in a couple of different sections.
Step 7: Peel off Painter’s Tape
While your caulk is still malleable, go ahead and pull up your painter’s tape. Doing this before it dries will help maintain a smooth edge to your line.
Step 8: Let it Cure
This is the most important step to long-lasting caulk. Check the directions on your tube and make sure not to introduce water in the area until it’s fully cured. This is probably up to 24 hours. So if you’re doing a shower or kitchen sink, make sure you don’t need it until this step is over.
Step Back and Admire
Go ahead, pat yourself on the back. Not only have you made your home more appealing (I’ve seen plenty with dry and cracking caulk), you’re also helping parts of your home last longer. It’s a simple weekend project that anyone can tackle.


Leave a Reply