Time to learn how to build a paver patio in your backyard! There are many ways to build a patio, but I’ve made a paver patio, so that’s what you get to learn.
Tools Needed
- Stakes
- Twine
- 3 Foot+ Level
- Flat Shovel
- Tape Measure
- Tamper
- Broom
Materials Needed
- Pavers
- Paver Sand
- Polymeric Sand
- Patio Edging
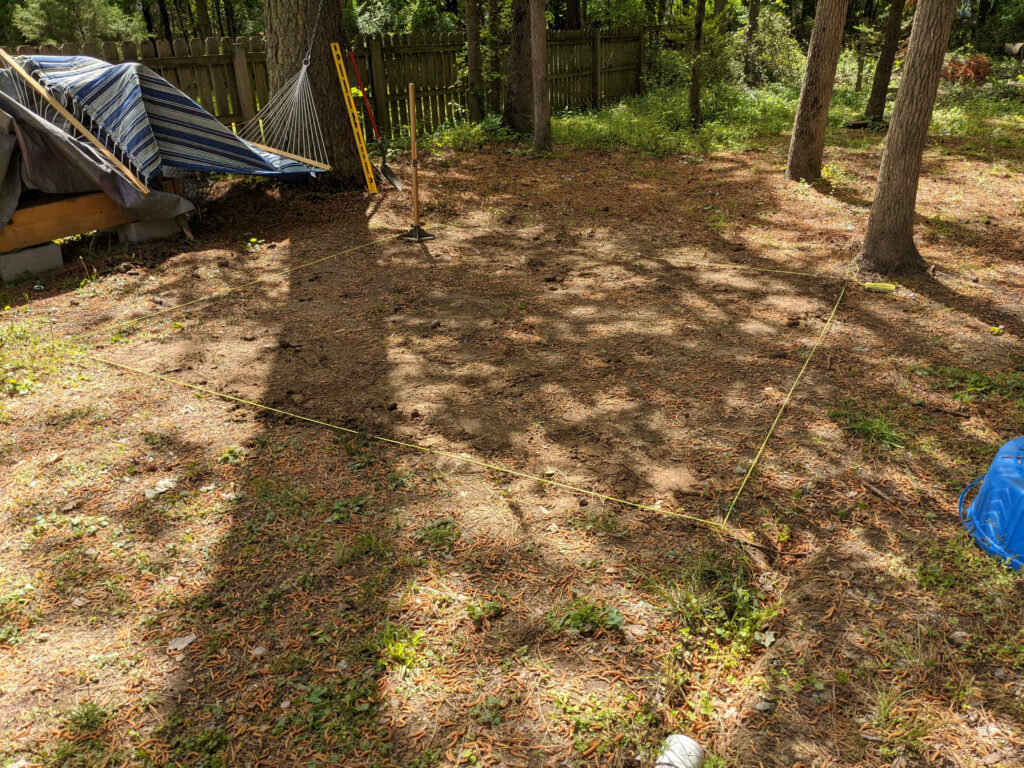
Step 1. Choose the Spot and Measure
Firstly, you need to pick a spot you want to build your patio. Since you’re using pavers, it is easiest to make a rectangle or square, but it’s your choice what the patio looks like. Once you’ve picked a spot, it’s time to measure. Since the standard paver is one foot by one foot, make sure your area is divisible easily into square feet.
There are pavers that are different sizes, so make sure you measure based on the pavers you want to use.
Step 2. Mark Out Area
Once you have a spot picked and measured, you need to mark out the area. To do this, get some yard stakes and twine. Keeping the twine a couple inches above the ground, use the stakes and twine to create the outline for your patio. You can also use spray paint and a flat edge, but I find the twine method easier.
Once you get the area staked, double check the measurements. If you’re making a square or rectangle, also measure the diagonals to ensure they’re the same distance. That’s how you check to make sure the angles are 90 degrees. If they’re off, adjust until they’re correct. Getting the measurements correct here will save you a ton of work and your finished product will look much better.
Step 3. Dig Down
Use your flat shovel and dig down the depth of your paver plus a half inch. Be careful to stay within the lines. Clear out the entire area and make sure it is roughly level. If your yard is on a slope like mine is, mark the grade you want the patio to be on your level in both directions and then consider that “level” for this entire project.
Fortunately, my yard is level enough side to side, so I only needed a grade going one direction. That’s preferred anyway so water flows off of the patio. Keep in mind that you can’t have too steep of a grade or your patio won’t be super useful. Mine is only a few degrees.
Step 4. Smooth Out Dirt
If your dirt hole is level and the correct size, you should start tamping it down. You really want your underlying dirt to be solid because that makes a big difference in the life of your patio.
Step 5. Edging
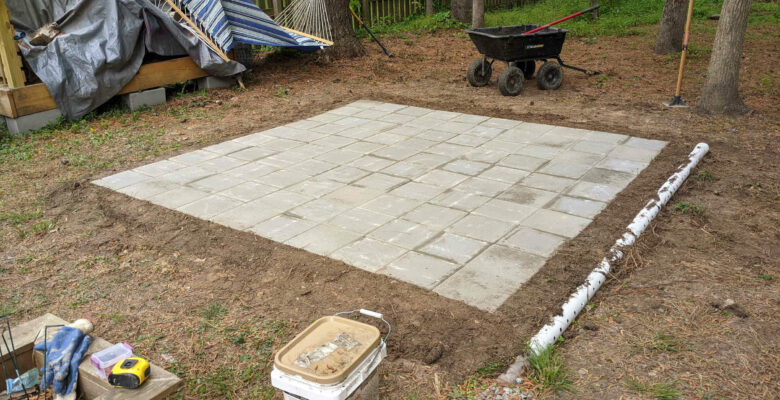
Next, you’re going to want to put in your edging on two sides. Make sure it is straight and slightly longer than needed. You’ll cut it to size once all your pavers are in. There are many types of edging out there. I actually just used my spare pavers and the packed clay around the outside.
However, my situation was a little unique because I was raising the land up instead of digging down into it. Where I put my patio is full of thick old roots that I didn’t want to cut. Therefore, my only choice was to raise the land.
The normal strategy is to dig down and use edging or your sod to hold the pavers in place. If you’re using flexible edging, you might be able to use one piece and just bend it around the corners. This will provide a stronger hold. Regardless, the flexible edging comes with stakes you’ll drive into the ground to hold it in place.
Step 6. Fill with Sand and Smooth it out
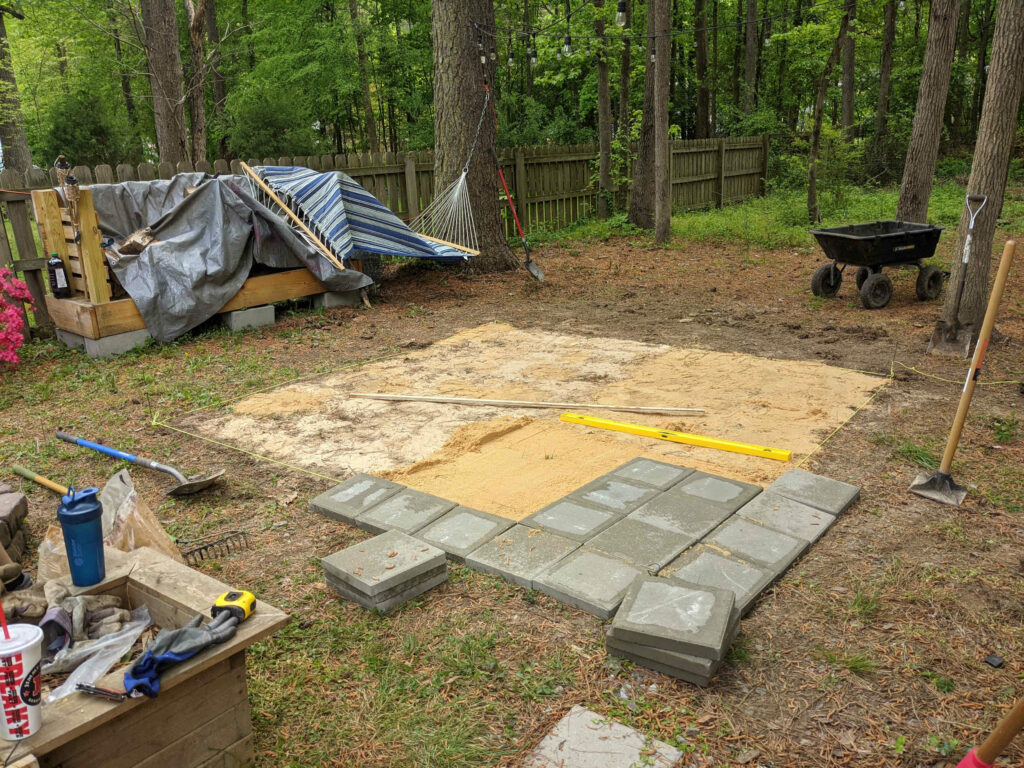
It’s time to dump a lot of paver sand into your dug out hole. Eventually, you’re going to want about a half inch of sand throughout. The goal is to put in enough to cover all the dirt and start your pavers.
I was using a 3 foot level, so I decided to create my patio in rows of 3. This ended up working great for me because I couldn’t reach further than that anyway. Once you have sand in your patio hole, you can’t walk on it anymore. Once you put pavers down, you can walk on those, but you have to stay at least one paver away from the sand at all times.
For example, when you’re laying the 4th row of pavers, you should stand or kneel on the 1st or 2nd rows only.
I used my level to smooth out the sand, but you can use anything that is rigid and flat. Some people suggest PVC pipes or 2x4s because they’re long, but I highly recommend something that won’t bend on you.
Not only does the sand need to be smooth, it also needs to be level. Additionally, it needs to be the exact height to allow the paver to be at the top of the hole. When you put a paver on it, the sand will not give way hardly at all.
Step 7. Lay Pavers
Next, we lay pavers. This is the step you should take your time with. You have your edging to guide you on height, but you should also be checking for level every couple of pavers.
Pro tip: Do not be afraid to remove a few pavers and redo the sand. No one gets every paver correct on the first try. If you give extra attention to detail here, your patio will look amazing and last forever.
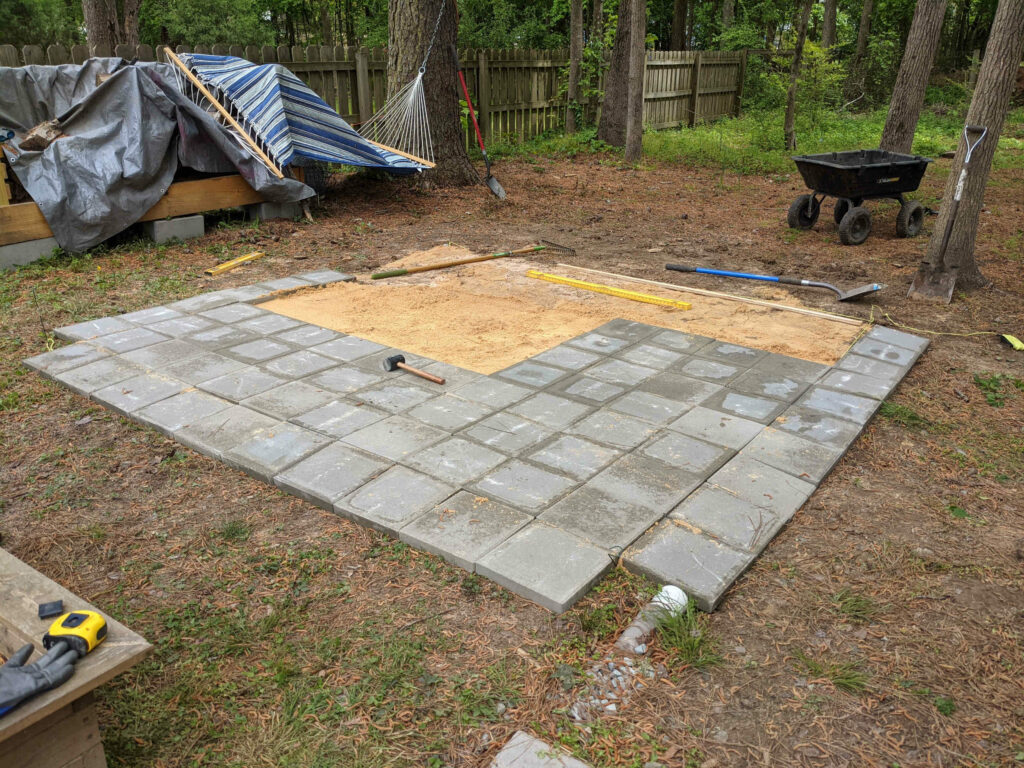
Step 8. Repeat To Build the Paver Patio
Now you just repeat pouring the sand, smoothing the sand, and laying the pavers until your paver patio is filled in.
Step 9. Pack The Sides Of Your Paver Patio
Before you get too rowdy on your patio, pack in some extra dirt around the edges and stomp it down. Don’t use a tamper here because you might chip a paver. The concrete pavers are very weak if hit with a paver or hammer. I speak from experience here unfortunately.
Step 10. Polymeric Sand
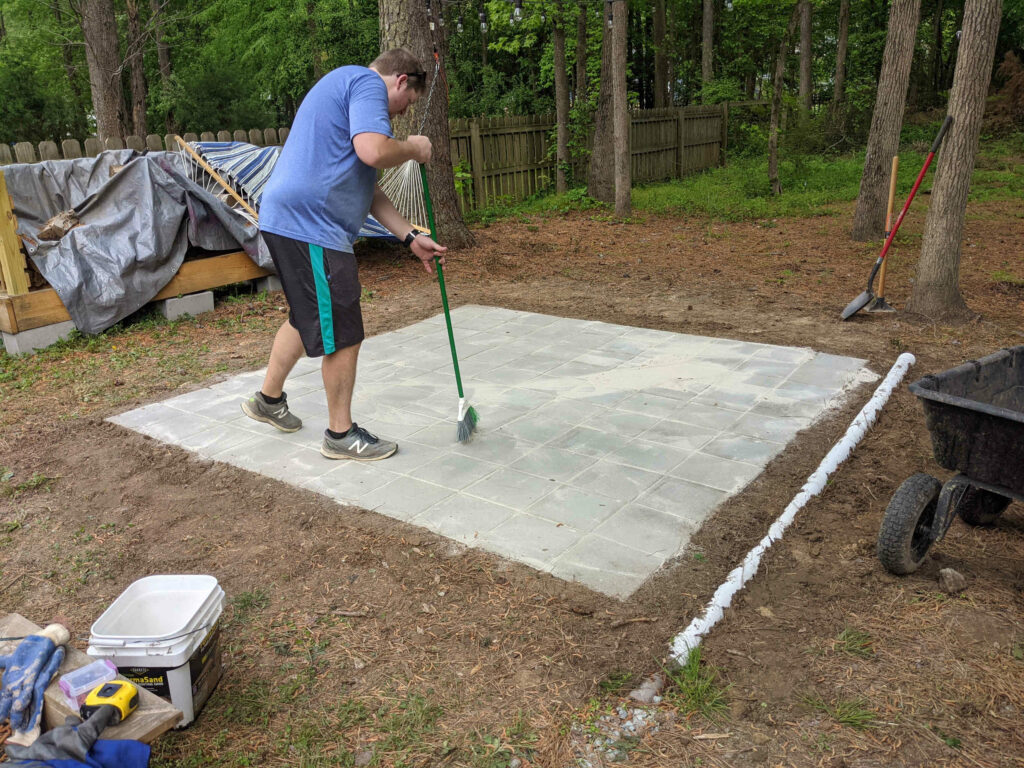
Finally, it’s time to fill in the cracks with polymeric sand. This stuff is actually really cool. It is the finest grain sand I’ve ever worked with. It fills in the cracks so that the pavers cannot shift over time. Basically, it creates a concrete-like hold between the pavers without actually being concrete.
To be completely honest, this step took me the longest. I completely misjudged how much polymeric sand I would need, so I kept adding tiny amounts and sweeping it around until it was gone. All in all, I didn’t actually use that much. It just looked like a lot more than would fit in the cracks. Those cracks will surprise you.
Be sure to stomp your feet around to help work that sand deeper into the cracks. Remember that this step is the one that protects your patio long term.
Keep adding the polymeric sand, sweeping, and stomping until all the cracks are filled in. Then sweep the excess off and spray your patio down quickly with a hose. You don’t need a lot of water. It’s just to clear the excess sand particles.
How to Build a Paver Patio
We’ve covered hot to build a paver patio through the 10 easy steps:
- Choose a Spot and Measure
- Mark Out Area
- Dig Down
- Smooth Out Dirt
- Edging
- Fill With Sand and Smooth It Out
- Lay Pavers
- Repeat
- Pack the Sides
- Polymeric Sand
All in all, my 10×10 patio took me roughly 6 hours to complete with myself and my friend Garrett. I don’t think it would go much faster with additional people either because there’s only so much that can be done at the same time.
I should also admit this was the first patio I built this way, but it turned out amazing. In 12 months, it hasn’t changed a bit. It still looks brand new. This is a project someone new to home improvement can certainly tackle themselves with enough patience.
Do you feel like you’re ready to tackle your patio project now?


Leave a Reply