Worried about what it takes to repair drywall? I’m here to tell you it is actually a lot easier than you think!
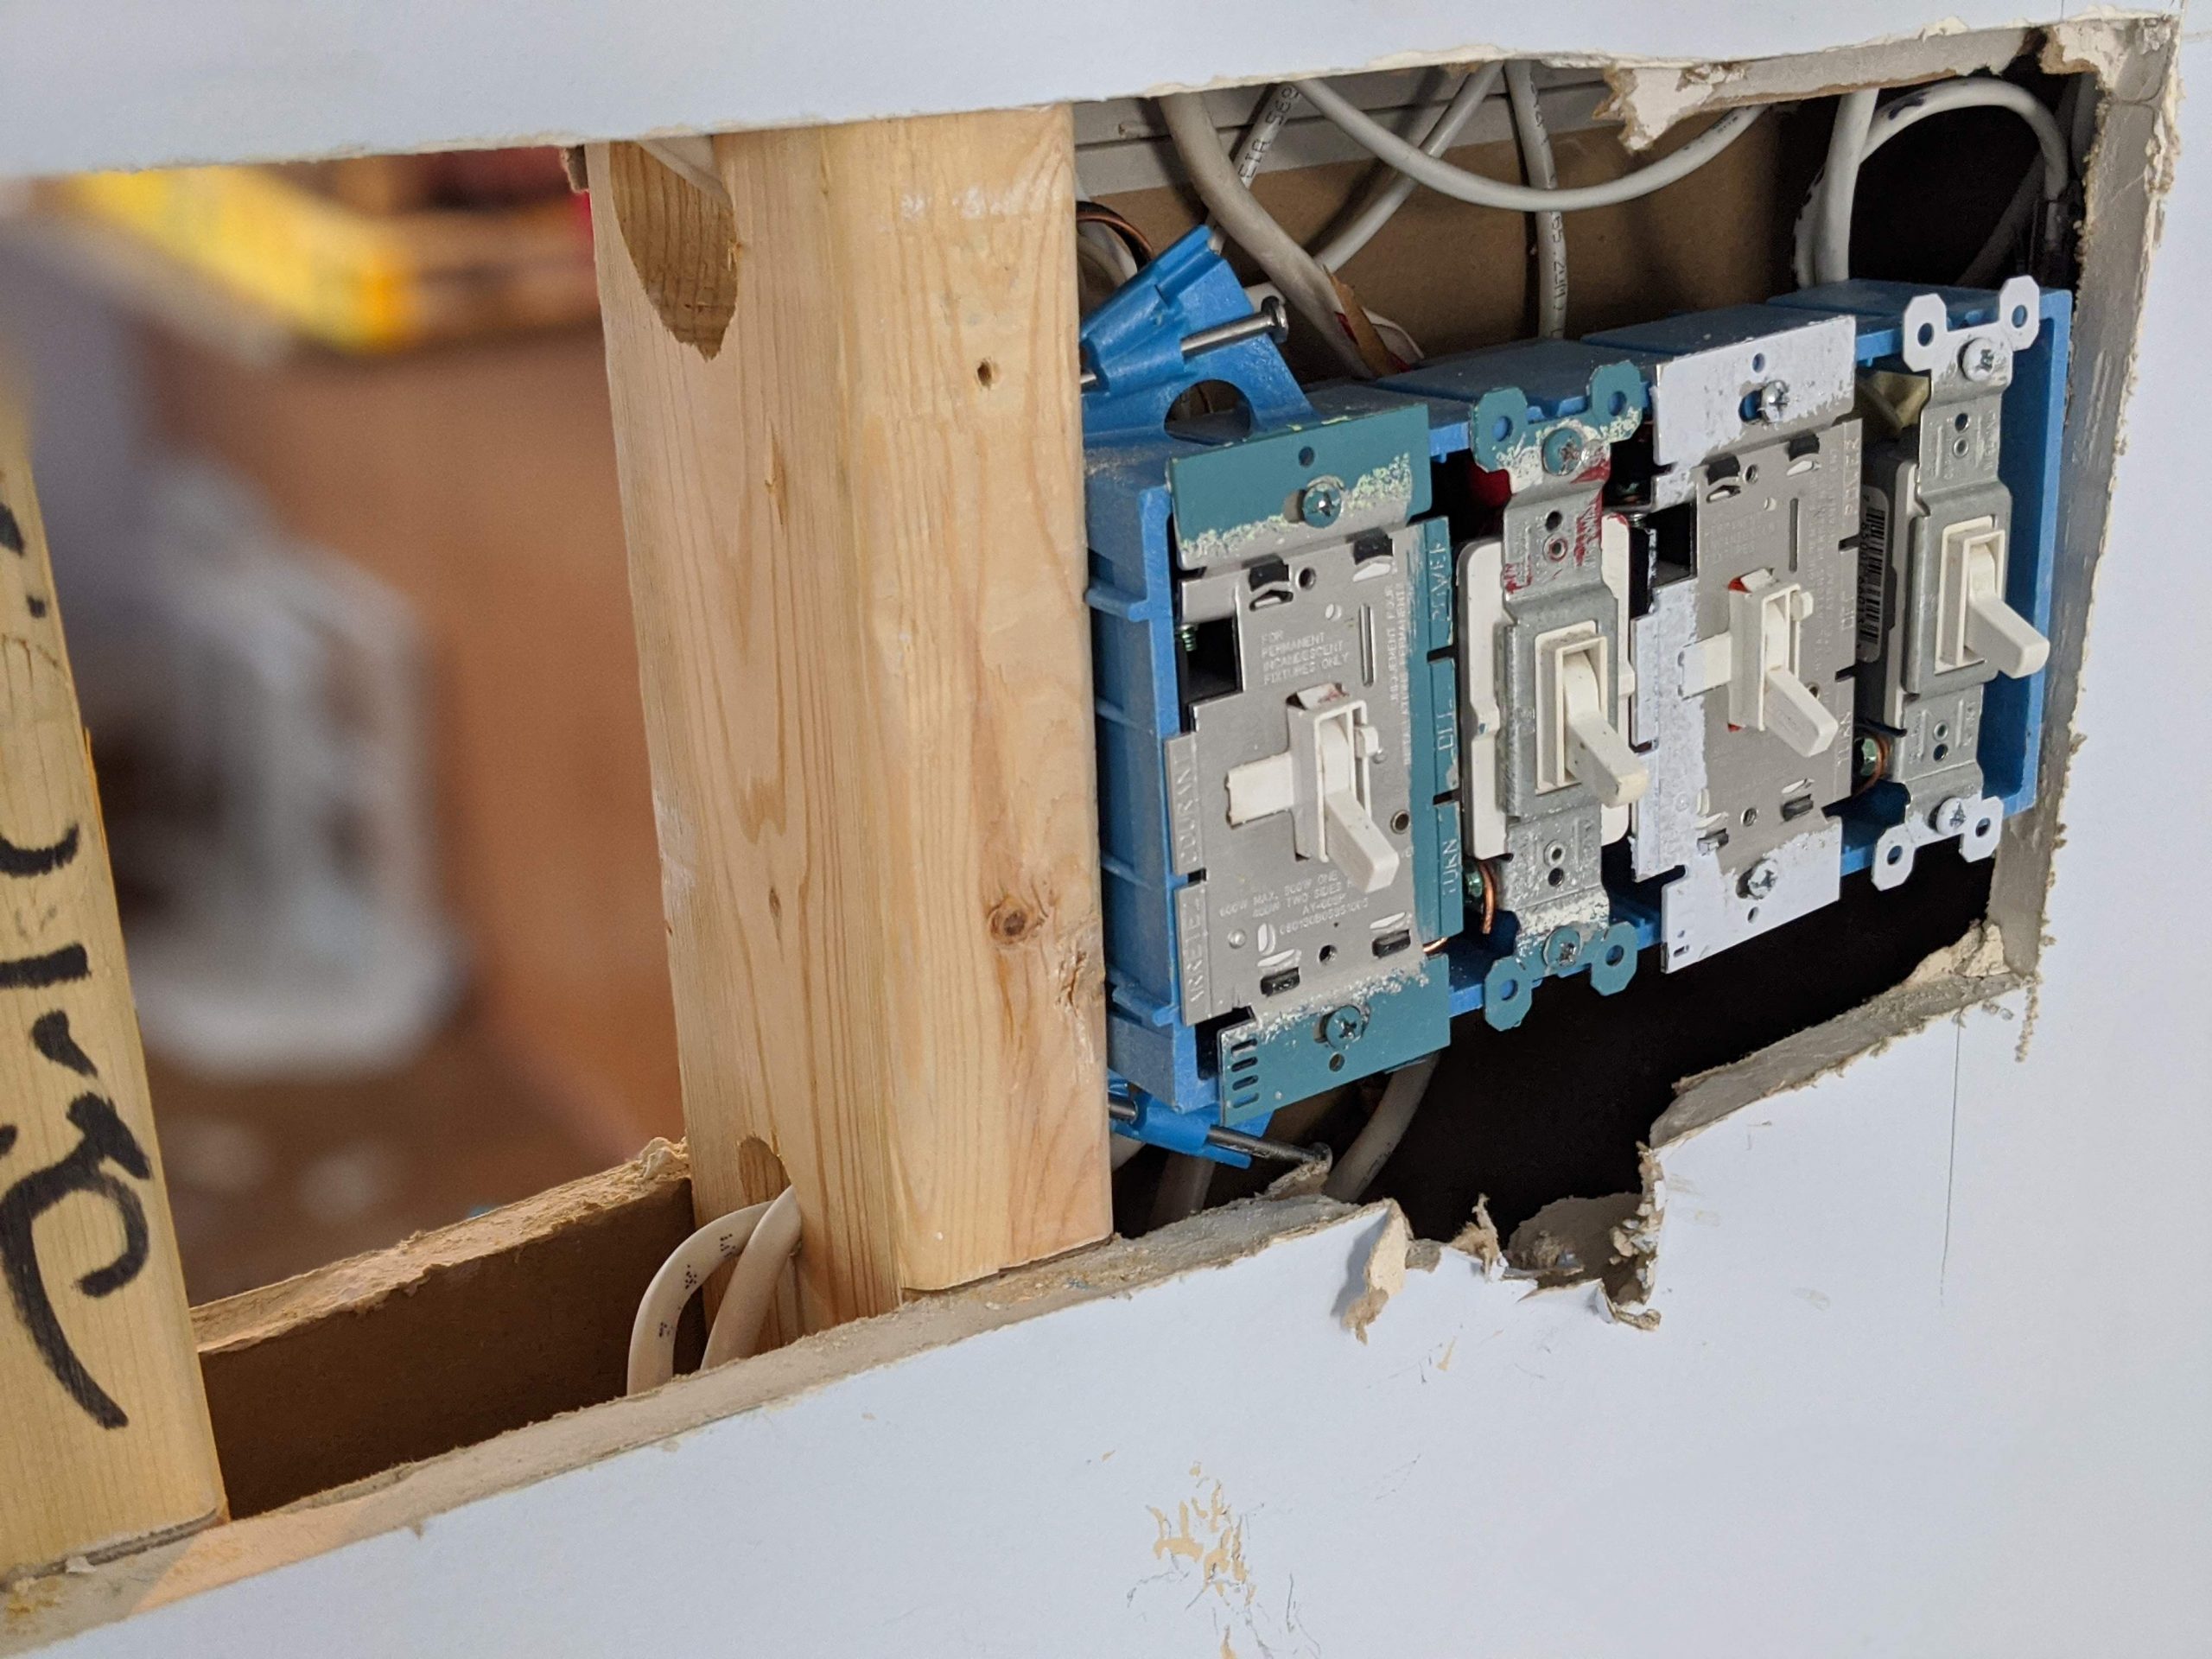
I’m doing a small home renovation project, part of which involves moving some light switches to more convenient locations. After I move the switches, I have to repair drywall holes.
Cut a Rectangle
So, you’ve got a hole in your wall? The first step is to make it a rectangle. It will also help you tremendously if you can get part of your rectangle exposing a stud or two studs, depending on the size of the hole. Once you get this rectangle cut, measure its length and width.
Mark on a fresh piece of drywall the length and width you need to cut out. My preferred tool for cutting drywall is a table saw, but there are a variety of ways, including “scoring and snapping” which is what the pros use. I tried it and it failed miserably. Since I wanted clean lines, I went with the table saw. If you don’t have any tools, a finely serrated knife will work too.
Make sure it fits in the hole with minimal gaps. If it fits, move on to the next step. If it doesn’t, cut it down or start with a fresh piece if too small.
One thing to keep in mind when cutting your drywall is that you do not want any crumbly pieces on the wall or on your fresh piece. Those will be impossible to fix. Cut your hole bigger to encompass all the crumbly bits.
Attach to Studs
If you have one or more exposed studs, you’ll have less work to do in this step. The main goal I have when attaching the fresh piece of drywall to studs is to ensure the corners are supported and that there isn’t any gaps larger than 16 inches without support. Drywall isn’t the strongest substance and can bend if not supported.
You can use any sturdy piece of wood for this step. I used scrap pieces of 2x4s because I had a lot lying around and the studs in your walls are already 2x4s.
Before you put the drywall on, you want to attach these pieces of wood behind where the new drywall goes. Primarily, you’re looking at the corners if it is a small hole. In my case, I cut the hole to expose the studs on the right side, leaving only the left side unsupported.
I took a two-inch long piece of 2×4 and secured it in the remaining two corners diagonally across the opening. The result was a small piece of exposed 2×4 that had enough room to put a drywall screw in without breaking the 2×4 or the drywall. I used 1 1/2-inch drywall screws throughout the entire process.
Once all corners are supported, I laid the new piece of drywall in the hole and secured it in place with my drywall screws.
Some things to look for:
- The drywall you added should be flush with the existing drywall or slightly indented. You can add plaster, but you can’t make it narrower.
- If you have any gaps wider than a quarter inch between the drywall, you’ll have a harder, but not impossible, time plastering.
- If any portion of your drywall isn’t secure, it will bend and bow making your end result less attractive.
Plaster, Sand, Repeat – The ABC’s to Repair Drywall
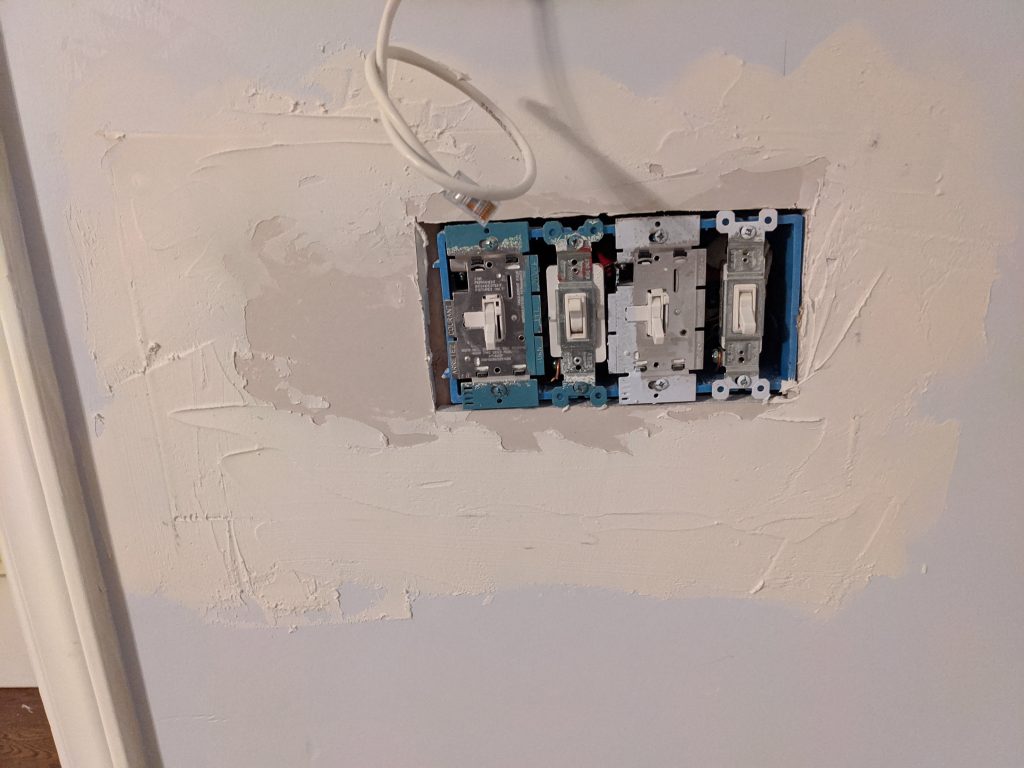
Once you have the drywall securely in place, you’re not even halfway done.
Next, you’ll take some drywall plaster and a trowel or wide putty knife and put a layer of plaster throughout all of the gaps. Your goal here is to try to fill all the gaps so that it can dry strong. You don’t need to worry much about it being flush at this point.
Next, sand that puppy down! Each time you sand, you want to make the plaster as level as possible with the drywall sides. You’re going to be using this plaster to make them look like a seamless single piece of drywall.
If you had a sizeable hole, you’ll want to use drywall tape. This adds support and helps prevent bowing. I’ve used it on holes as small as one foot wide, but it is up to you whether you want to use drywall tape for your repair. If you do use drywall tape, it goes on between the first and second coats of plaster, after you’ve sanded.
After your first coat, and tape if you’ve used it, you’ll likely have two or three additional coats of plaster and subsequent sanding to get everything smooth and seamless. You should use as many coats as necessary to make it look like you want it to; however, do not keep adding coats if your problem is that it is protruding outward. Plaster will continue to add thickness to it.
I’ve used multiple types of plaster, but the important thing I’ve found is that you read the label to ensure it is good for painting and that it is for drywall. There are many types, so check for those key criteria.
Paint
Once you’ve got it all smooth and seamless, it is time to paint! Ideally, you’d repaint the entire wall because paint matching isn’t a perfect science, but if you have leftover paint for that wall, you can likely get away with just touching up this one spot.
Conclusion on How to Repair Drywall
I’m not a professional, so hopefully this will help you see that you can tackle this task as well. If you go slow and pay close attention to the details, you’ll be able to get a finished product that looks great.


Leave a Reply